
I read such interesting topics on savings. It is my hearts desire to stay home with my children, to craft with them. Sometimes I feel like my heart is meant to have lived back in simpler times. I like my clothes line though I am too busy to use it the way I want. I like making my own laundry detergent, dishwashing detergent, food from scratch- did you know how completely cheap and easy it is to make your own pancakes or pancake mix from scratch- instead of bisquick or other mixes?
Anyway, back to my topic, sorta. These are 2 topics on some of my favorite blogs that I felt needed to be shared here. Crystal and Heather have both shared a great deal of information on home life, savings, blogs and encouragement to me. I will include the articles below, and you can click on the title to take you directly to their blogs. Follow them. I am sure you will not be disappointed and you will feel inspired like I have.
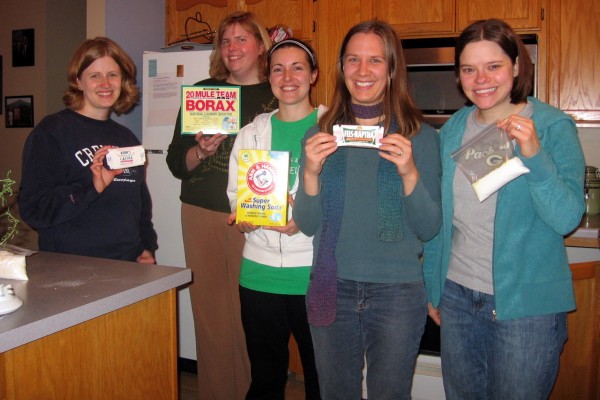
Crystal at Money Saving Mom shares a guest post about an idea I LOVE. Who wants to do this with me?
Save Money and Have Fun By Starting a Frugal Club
Recently one of our members was interviewed by our hometown magazine, Rochester Magazine. Now more people in our town have asked us about the club!
How to start your own Frugal Club:
*Find friends who are interested in a frugal lifestyle.* Get together and talk about what everyone is already doing to save money.
* Brainstorm ideas of what you would like to do to save money/get ideas from Money Saving Mom.
* Have someone volunteer to lead or organize each project you decide to do.
* Have people bring what they already have for the project and divide the cost of what needs to be purchased.
* Get together and try some of the projects.
* Rotate homes for hosting and bringing treats.
* After finishing a project, evaluate if the project was beneficial and if it saved money.
* Have fun!
Projects we have done as part of our Frugal Club:
* Made and then exchanged seasoning/mixes (taco seasoning, chai tea, popcorn seasoning, oatmeal packets).* Traded items we didn’t need or wanted to re-gift (see this post on a Stockpile Swap Party for more ideas).
* Made personal products (facials, shampoo, deodorant, cocoa lip balm).
* Made greeting cards from scrap paper and magazines.
* Had a holiday cookie exchange.
* Shared a CSA vegetable box together.
* Made window cleaner, laundry detergent and dishwasher detergent.
* Made dish scrubbers out of onion mesh bags.
* Went to garage sales together in the summer
* Discussed freezer meals/cooking in bulk/purchased meat in bulk and split it.
* Made homemade air fresheners.
* Discussed frugal baby things (cloth diapers, cloth wipes).
* Exchanged or lent books we already own.
* Made fire starters for camping.
* Rented an aerator and did multiple yards.
* Shared packets of seeds for our gardens.
* Hauled our own trash/recycling.
* Exchanged coupons.
* Picked strawberries.
Projects we plan to do in our Frugal Club:
* Try our hand at home haircuts and go to a cosmetology school for inexpensive hair cuts.* Make candles and lotions.
* Wash each others’ windows.
* Help each other with time consuming yard work (trimming bushes)
* Plant herbs.
* Make “sandwich bags” out of cloth.
* Make soap when we visit a goat farm in May.
Jenny and her friends/current Frugal Club members: Jill, Beth, Carla, Kristy & Dana all live in Rochester, MN. In our group we have five nurses and one librarian. We enjoy learning from each other and of course talking! In the last year, three babies have joined the Frugal Club so our meetings are a little different than they used to be!
Heather at Family Friendly Frugality shares a great tutorial (with pictures) on making a peasant dress!! I can't wait to try this for my daughter. She Loves dresses, and this looks very easy.
How to Make a Peasant Dress

I admit, I like easy sewing projects. Peasant shirts and dresses are super easy to sew because you really only need some 2 sleeves and 2 body pieces!
I also love that they are the perfect blank canvas to mix and match fun fabrics and for applique. You can ruffle them, cuff them or simply hem them. Cap sleeves, short sleeves, long sleeves, ruffled sleeves, etc. Honestly, the possibilities are endless!
Make a plain white peasant blouse to go under a jumper or a pair of overalls. Or make a long flowing peasant dress with an empire waist for a princess costume.
Like I said:
Peasant Dress + Possibilities = Endless
You can draft your own pattern, or buy one (I use the Portrait Peasant Dress pattern from YouCanMakeThis.com) or you can use an online tutorial to get sizing info (I like this one here and this one here).
After that though, the directions are all pretty much the same.
1. Cut out your pattern pieces (be sure that your fabric is washed, dried and ironed). Check your pattern or tutorial for instructions on length and sizing.

2. Serge or zig zag the top and bottom edges of the sleeves and the body pieces. I made a ruffled sleeve and neckline, so I went ahead and pressed the bottom and top of my sleeves down 1 1/4 inches and the the top of the body pieces 1 1/4 inches as well. Go ahead and unfold the pressed edges for now.

3. Now you’ll want to sew one sleeve to the right side of a body piece. Right sides together. Repeat on the other side (also sewing the 2nd sleeve to the right side of the body piece).

4. Lay both sides on top of each other (right sides together) and match up the alternate sleeve with the other body piece. Sew the sleeves to the body pieces.

5. Match up body pieces and sleeves at the sides. Sew up either side to close off the body of the dress and the sleeves. (I usually serge the edges at this point, you can zig zag if you don’t own a serger. This keeps the fabric from unraveling in the wash)
**Sorry no pic of this step. Kids woke up!**
6. Now you’ll want to fold those pressed edges back into place on the sleeves and the neckline. Because I was making ruffled edges, I first sewed a continuous line 1/2 inch from the top edge (of both the neck and the sleeves). Then I went down 1/2 inch further and sewed another line around, leaving a gap opening to insert the elastic.

7. Measure out much as elastic you’ll want (measure your child and add about 1 to 1 1/2 inches to the arm measurements and chest measurements to determine how much elastic you should use) and put a safety pin into your elastic to thread through the gaps in the neck area and the sleeves. It should be encased within the two lines of stitches you sewed in the previous step.

8. Grab the elastic and zig zag either end together. Then close up the gaps on the sleeves and the neckline.

9. Now it’s time for your hem. You can either serge or zig zag the edges, press to the desired hem length and top stitch. OR you can add a cuff or a fun ruffle. I opted for a cuff, but I have to admit, I didn’t do a great job this time! Check your pattern for instructions on length and sizing.
I love making peasant dresses for my little girl! They are so easy and great for beginners. I highly recommend the Portrait Peasant Dress pattern from YouCanMakeThis.com, she makes the whole thing so effortless!
I own a serger (this one) so I serge all of my seams. If you don’t own a serger (I highly recommend you purchase one if you intend to make clothing on a regular basis AND want it to last), you can just use the zig zag setting on your sewing machine.
If you make a peasant dress or blouse, I’d love to see it!
~I also love the craft site YouCanMakeThis. It is very useful, and has freebies and cheap patterns to download. I have several printables from there as well.