Showing posts with label frugal. Show all posts

Thursday, March 1, 2012

{Guest Post} How to make Plarn


Pin It


Thank you to Tammy Curry for Guest Blogging today. Read her profile at the bottom of this post.

How to make plarn

We love to craft at our home however we don't always have a ton of ready cash for supplies. So we have begun repurposing items into various crafts. Our most current passion is plarn aka plastic yarn. An awesome material work with, tons of fun for the kids. The only tools you really need are a pair of scissors and a crochet hook, materials plastic shopping bags and an imagination.

Just as a quick note, do not be intimidated if you do not know how to crochet. There are plenty of easy to follow videos on YouTube.com.


Smooth out your plastic bag on a flat surface.


  1. Fold the bag in 1 to 1 ½ inch sections.


  1. Cut the handles and the bottom of the bag off. I save these for stuffing. One of our goals is to make outdoor seat cushions.


  1. Cut the bag into 1 inch strips while it is still folded.


  1. Insert one end and then back into itself and pull tightly to join them together.


  1. Begin rolling like you would roll a ball of yarn. To add to an existing roll take the end of a new strip and attach by inserting the loop of the new strip into the end of the existing roll. Pull the loop of the new strip through itself and pull tightly. Similar to when you created the loop.


  1. Begin crocheting your project. You can follow standard crochet patterns. Blankets can be made to use at picnics, etc. Just remember any projects need to be washed by hand and not go into the washer or dishwasher.


    About Tammy Curry: 

    Crazy, insane, and loving life here on the beach. We have been through a lot over the years but I can honestly say that the light at the end of the tunnel was not an oncoming train this time.

    I have a loving husband and two beautiful children. We are no longer homeschooling our children, they will be attending private school this year. We do still support our friends and family that are on that awesome journey.

    I am a writer, social media addict, mom, wife and daughter, not always in that order.

    My husband and I are working towards a more sustainable lifestyle. We have been on and off the wagon on this over the years. We have spent the last few months putting our plan together and putting it into play. Our end goal is creating a viable, self sustaining suburban homestead.

    To this end we have created the Sustainable Education Initiative. We will be sharing our journey and teaching others how to make simple changes in their own lives. The end goal is to create a better world for our children and their children.

    You can find out more about Tammy and follow her blogs here:

    Thank you for filling in while I enjoy my new little one! 

Monday, January 16, 2012

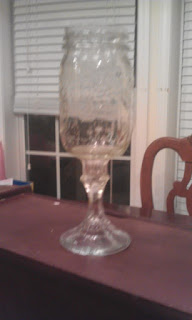
Mason Jar wine glass.....

I had a quick fun gift to make for a Christmas party, and had seen these wine glasses at the Southern Christmas Show. I am already going to apologize for the poor pictures my phone took. I put it together quickly one night and took pics as I threw it together.


Here is the step by step:

These are the materials I used.
  • medium sized mason jar (quart) already on hand
  • cheap candlestick from thrift store .50
  • DAP adhesive- already on hand.


just another view of it.

I flipped the jar over, centered where I wanted the candlestick to go.


Added the adhesive around it.
held it in place for a little while and let it sit overnight.

and this was the final product.

Wednesday, January 11, 2012

Quick kids project

Lil man is just too little to try this with yet, but Spencer and her friend H-man did great.


All I did was get those cheap wood Christmas decorations from Michaels. These are not the ornaments ones though they look like ones, they just don't have the hole in them. I add that with my dremmel tool.


I put paint in separate areas of egg carton. and let her have at it.
She has progressed so good in her design of them.


She gets really into it now. Love the designs she does. Her plastic cup that she rinses her brushes off in.
She even added glitter to them. She did so good. I am so proud and I love hanging these on my tree every year. 
Her and her buddy H-man have so much fun doing crafts. I have some to give his mommy too.
Now being Angels. They did so good.
H-man showing off his projects.

My sweet girl showing off her work too!


Well this was just a quick post about a quick project. I started this when my daughter was almost 2. We started with markers and these ornaments. I just put newspaper on the floor and let her go at it. So interesting to see how she has grown. We also use these for her to give as gifts to friends, grandparents, aunts/uncles. I like teaching her to give and to give homemade things. These are definite treasures.

Tuesday, December 13, 2011

{DIY Cupcake Topper design}

Ok I think these things are SO darn cute. I love when I find the freebie printables and downloads, but sometimes it is hard to find what you are looking for, a certain theme or such, ya know.


I have been scouring the internet for a week now for a tutorial on how to do it myself because after all I am a crafty person and just can't bring myself to pay someone to do it on etsy.

So I figure there are lots of options.
  • using my cricut to cut out the shape and using a sticker for the image, easy and cute and pretty quick, but tough for doing something boyish and tractor like 
  • I could use MyMemories Suite- haven't tried that yet, no time at home lately but hope to try that option soon
  • or the way I found recommended to do it- use Microsoft Publisher. 
    • add shape (circle or square), insert fill color (or a picture), then add word art- letter or number, or clipart. 

Well I was at work, shhhh, and had a few minutes and we do have MS Publisher, so figured why not try it. I have not figured out how to add the nice dot borders and such, but here is what I made:


Topper

I am pretty darn excited about how it turned out. As you can probably tell we are doing a farm/tractor theme for my son's birthday party. We have a Farmall Cub tractor- which is red, not green like John Deere, so I had to search for the right images and color schemes. I have this available for free download if interested just click on it above. I may try to do a couple generic ones but you may be able to figure it out yourself. Good Luck and I hope this VERY basic tutorial or description helps you out. I have not used Publisher before, so it took a bit getting used to where things could be found, but it was still pretty darn easy.


I also realized you may not want toppers that have 1's and W's or my son's name on them, so I made some generic ones. I only ask that you give me credit and send followers back my way for sharing them. I found it very hard to find free tractor toppers, so here are some for you:

Generic Tractor Topper                                                                  
So I left a couple blank so you could add in names, or letters or numbers of your own.

Tuesday, November 8, 2011

{Birthday shirts}

              
 Ok so I finally finished my sons birthday shirt. I shared the first part of making it Here.


Well I took pictures of the front and back of the  Heat and Bond that I used.It was the Ultrahold. It was very simple to use and I will go into more pictures below this quick "1" as I decided to make another shirt while I was at it. You need to read the directions since it tells you which side to use first.

Applique in place and ready to iron on.
 Iron on, following the directions.


And Done

Well, it was so quick and easy, I decided to make another shirt. Following the same basic steps as above, just with more pictures lol. I will add commentary where needed, otherwise its pretty self explanatory via the pictures.


I used this clearance T-shirt from Walmart- $2.50. It had a pocket on it that I didn't want but it was so cheap and removing a pocket is as simple as using a seam ripper.
see here you go, no pocket. I also don't worry that it is short-sleeve since you just add a long sleeve shirt under it.


 So I didn't have this pattern on my cricut, and to save cutting it twice I fused the fabric to the heat and bond first.

 it was quick and looked like this once done.


 I laid out my pattern, turning the knot part to the side so it changes the pattern a bit to look more like a real tie knot.


I traced it out first, can you see the white chalk lines? Then cut it with my rotary cutter. Do you see how the knot part being a different direction in the cut makes it look better now cut out?


 peel the paper off the back
 line it up on the shirt and iron it on.

And ta-da! just had to stitch it down with a zig-zag stitch- but don't worry- that's not required.

And here are both shirts completed.

See just having an applique shirt is not as difficult as you once imagined!

Thursday, October 6, 2011

{Front Entryway}

See I told you I had a busy weekend of projects to share with you. In my mad fall decorating streak, I had to capture and update the front entryway of the house, even though no-one, and I mean, NO ONE, Ever comes through that door, unless they are delivery people or don't know us well yet. It probably has something to do with not having a front walkway.

I did not take a before picture, so sorry! You can see my fall wreath on the front door through the mirror. Many items in the picture are sentimental and antique items passed on from my grandmother (Mimi).
 

The large mirror that is hanging is one of them- part of me would love to paint it and update it in a white probably, but its one of those items my mother would kill me for changing. The white lamp is a "Pink Lady" statue that my grandfather wired and had made into a lamp. I remember it from growing up- it was always in their house and makes me think of them. I happened upon a "Pink Lady" and "Blue Boy" smaller statue at a yard sale almost 10 years ago that I used to have on this table as well. But we are changing things up now.


Now that framed item leaning up against the wall is a barometer. My grandmother made the needlepoint rooster weather vane. I am not sure that it still works as when we moved into this home, it cracked the barometer part and it typically seems to fluctuate near change. Granted, it is not on an outside wall like it is supposed to be. Maybe that would help.


Here are a couple closer shots of the barometer just so you can see it better.  Sorry about my shadow in the way. This was as good as it gets.


I added a burlap bag that I purchased at Tractor Supply for $2.99 for some texture and contrast. Used a wooden frame holder I already had to hold a cheap Dollar store frame with a Fall printable on it. The vine pumpkin I have had for years and years. It was $3 at the time I bought it from Carolina Pottery. I had also grabbed up this amber colored vase at TJ Maxx and it has held these roses for quite some time. These roses are sentimental as well. I don't keep every rose or set I have ever gotten, but some of them I do, besides it makes for nice Free Decor afterwards.


{Update: I have since rearranged a little more. I moved this whole table under my gallery wall of pictures. Hung the barometer up on an outside wall- actually above the bookcase with the fall topiary. And had found a few more pieces to change around. I had to move the table, and soon the mirror too, so that I can move my china hutch out of the former Dining Room so it can fully be the kids playroom. So Had to make room for it. will update with pictures later}

Deals:

(clicking links helps fund this blog)