Showing posts with label crafts. Show all posts

Tuesday, June 5, 2012

{New Pendant lights}

This has been quite a process and I want to explain it well, but I Love seeing the blogs and pinterest ideas using new pendant lights. My husband is very proud of what we ended up doing and has been asking if I posted about this yet. So please make sure to comment on here if you like it or you will Crush him LOL. He is very proud of himself. ok- so we are clear- please comment on your thoughts to this lighting update.....mmmk. K.

 I love the Mason jar ideas, but when I tried a Mason jar here it didn't fit the threading. So I just took down one of the white shades to try out a couple ideas and see what I liked.
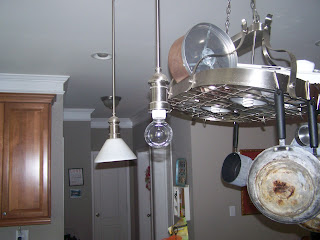
This is just putting in one of the round bulbs that go above our bathroom vanities. I like it ok.

It's not horrible, but I do like it better than the white shade.

It is less destracting than the white shade especially with our pot rack right behind it.
So I left it up for a while to see how I felt about it and til hubby got home to get his feedback. This confused the heck outta my kids. My 5 year old kept asking about it- she thinks I am a bit nuts sometimes.

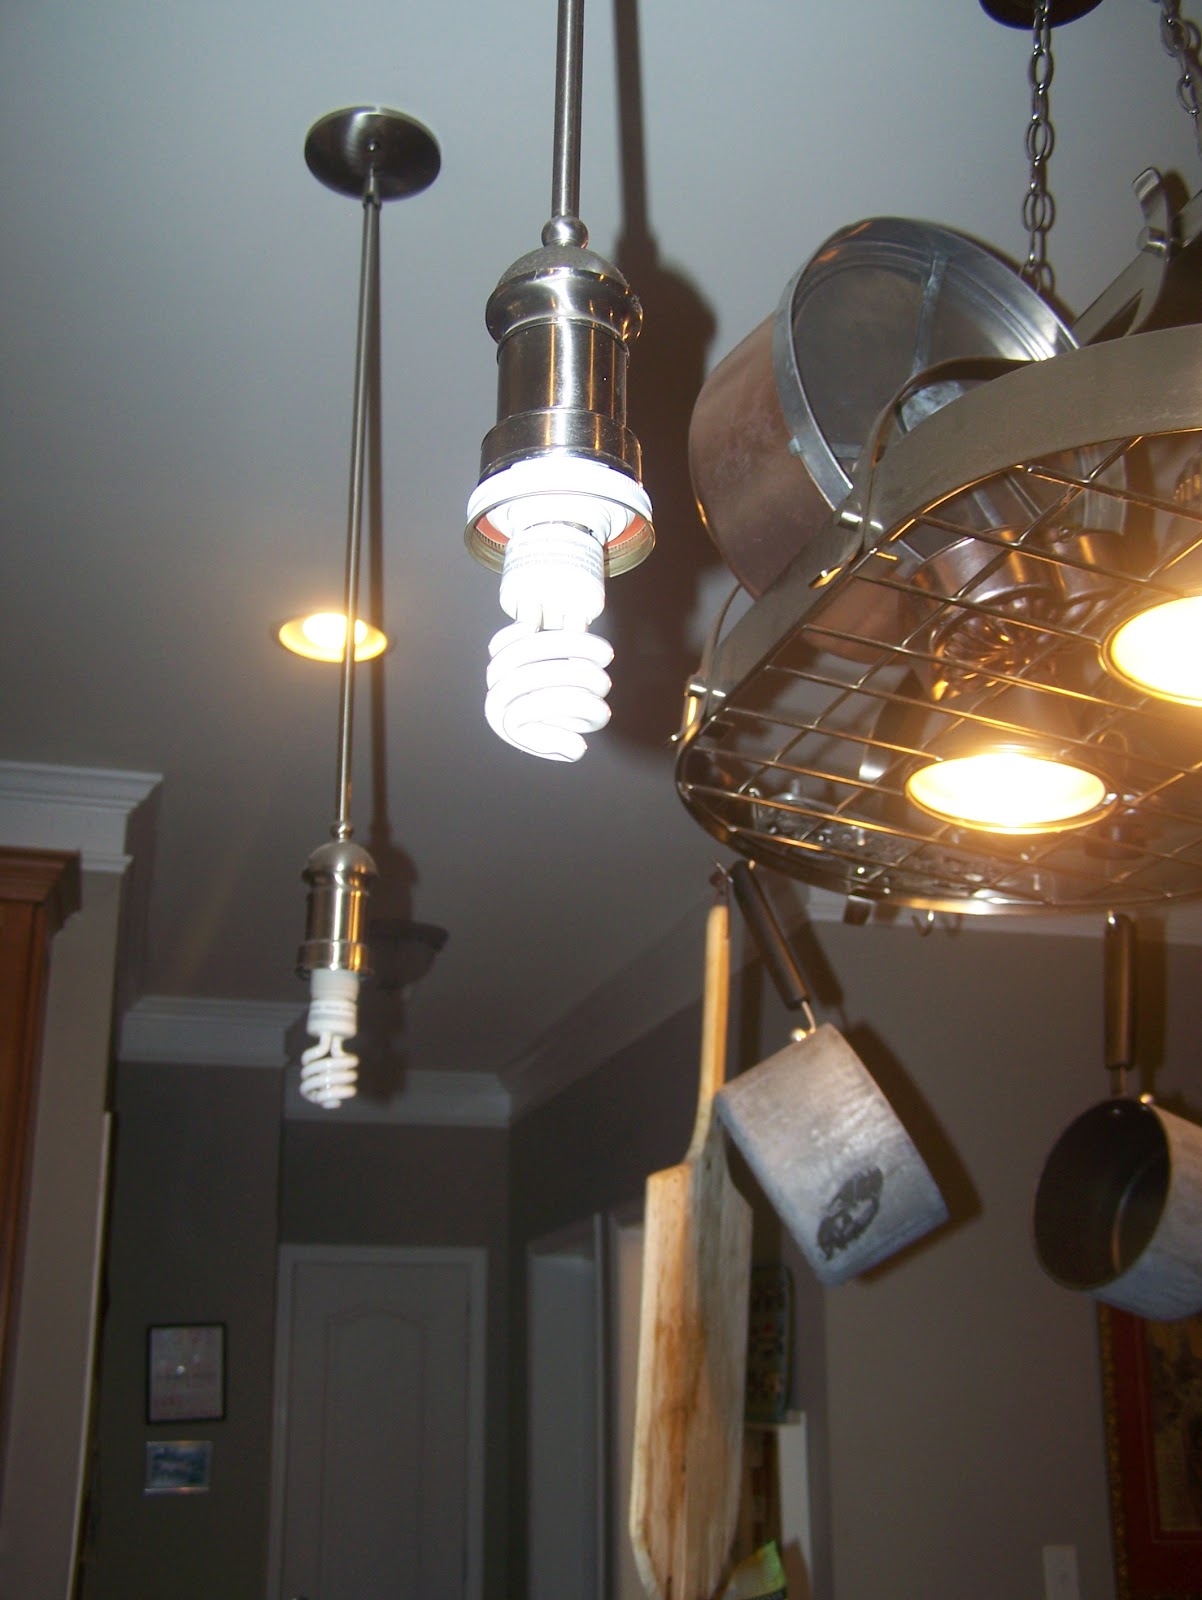
Well hubby got home and had an idea. When I told him my dream look for this-

You see this little white ring. It's ceramic and it is the threading that holds the shade in place. Hubby said well let's take a mason jar lid- the flat part and trace the small part onto it and cut it out. We used regular kitchen shears

This is the flat lid of the mason jar- the part that usually seals, with the cut out area to fit around the white ceramic threading.

He just cut around it. Now watch out it is a bit prickly and can scratch or cut you.

Then we put the ring around the flat lid held it up and screwed the ceramic ring in and it held.


This is a closer view of it in place. I tried to use an edison bulb but they were too wide to fit in the jars. But the basic CFL looks fine.


Then I used 2 blue Mason jars and screwed them onto the lid- Now doesn't that look pretty cool.
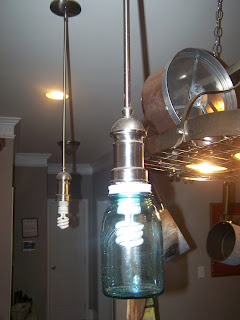
Close up of it at eye level- see how it looks good even with the CFL in it?


With the light on! I am in LOVE


In a dark house- doesn't it just glow! This makes me so happy. I leave these lights on at night and it casts such a nice cozy glow about it and reminds me of something from my child hood that I just can't place.


Then I noticed the white lid and said to hubby- I am going to spray it silver so it will blend better and he reminded me we had silver ones lol. Guess I just look for a reason to spray paint things.

So we switched it out for the silver one! Now it looks better and like it was meant to be there. It looks good with the living room mantel in the background.

See even with the pot rack behind it, it works better than the old lights.  It is so sweet and fun. We have had these up for about a month and a half now and we still love them. What do you think? If you love it, please leave a comment, remember my hubby's fragile ego?!? ;-) I don't think I have written a blog post that he was this excited about, or excited about at all LOL. Makes me think of Mandy from Sugar Bee Crafts hubbys new blog at So I married a Craft Blogger.

I have read hubby several of his posts, and he cracks us both up. So be sure to check that out too.


Pin It

Thursday, March 1, 2012

{Guest Post} How to make Plarn


Pin It


Thank you to Tammy Curry for Guest Blogging today. Read her profile at the bottom of this post.

How to make plarn

We love to craft at our home however we don't always have a ton of ready cash for supplies. So we have begun repurposing items into various crafts. Our most current passion is plarn aka plastic yarn. An awesome material work with, tons of fun for the kids. The only tools you really need are a pair of scissors and a crochet hook, materials plastic shopping bags and an imagination.

Just as a quick note, do not be intimidated if you do not know how to crochet. There are plenty of easy to follow videos on YouTube.com.


Smooth out your plastic bag on a flat surface.


  1. Fold the bag in 1 to 1 ½ inch sections.


  1. Cut the handles and the bottom of the bag off. I save these for stuffing. One of our goals is to make outdoor seat cushions.


  1. Cut the bag into 1 inch strips while it is still folded.


  1. Insert one end and then back into itself and pull tightly to join them together.


  1. Begin rolling like you would roll a ball of yarn. To add to an existing roll take the end of a new strip and attach by inserting the loop of the new strip into the end of the existing roll. Pull the loop of the new strip through itself and pull tightly. Similar to when you created the loop.


  1. Begin crocheting your project. You can follow standard crochet patterns. Blankets can be made to use at picnics, etc. Just remember any projects need to be washed by hand and not go into the washer or dishwasher.


    About Tammy Curry: 

    Crazy, insane, and loving life here on the beach. We have been through a lot over the years but I can honestly say that the light at the end of the tunnel was not an oncoming train this time.

    I have a loving husband and two beautiful children. We are no longer homeschooling our children, they will be attending private school this year. We do still support our friends and family that are on that awesome journey.

    I am a writer, social media addict, mom, wife and daughter, not always in that order.

    My husband and I are working towards a more sustainable lifestyle. We have been on and off the wagon on this over the years. We have spent the last few months putting our plan together and putting it into play. Our end goal is creating a viable, self sustaining suburban homestead.

    To this end we have created the Sustainable Education Initiative. We will be sharing our journey and teaching others how to make simple changes in their own lives. The end goal is to create a better world for our children and their children.

    You can find out more about Tammy and follow her blogs here:

    Thank you for filling in while I enjoy my new little one! 

Tuesday, February 28, 2012

{DIY cupcake toppers}

I wanted to share with you how I put together the cupcake toppers I designed and made for my son's first birthday. I am sorry it has taken so long, since his birthday is in November and this post has mostly been written up in pieces since then. However, then the holidays rolled around, and then my focus has shifted to preparing for Baby Girl #2 arriving this month. So please forgive me.


I used the toppers both for the cupcakes and the cake for some decoration.


Here is a sample of the tractor topper I made and printed out. See the very short and basic step-by-step of how I made them here.


These are 1 inch circles, so to be simple I used a 1 inch circle punch to get them all punched quickly. Then I knew I wanted to layer them with some cardstock of some color. I did not have any bigger size circle punch. I was figuring 1 1/4 or 1 1/2 inch punch for the layered piece. I had looked and these are like 9.99 at least, and both Michaels and Hobby Lobby were out of this size. So I checked out a local downtown shop in Lincolnton, NC called Chic Custom Creations and I tell ya, I hit the jackpot.


I was able to use THEIR supplies/equipment- not paper for $5. I bought paper for 50 cent, and used their supplies to cut out my green and red 1 1/2 inch circles there and take them home to layer. This made my life to simple. I had planned to buy one and they did have it, but once I bought it and got home, no telling when I would have found time to do it. But I was kid free and sat down and got it done in less than 5 minutes. They were super helpful, offering suggestions and tips, helped me find what I needed. Koni- the owner, was not there. She was at a charity scrapbook event, but the staff that was there was very knowledgeable and kind, so I cannot imagine that Koni would be any different. They offer classes for various ages and levels through out the month.


So here is a picture of my green and red layer to see how it would look once I got home.


Then I just taped the 2 layers together and added toothpicks on the backs with tape and done!

This made for super simple decor for the cake and cupcakes. I also laid some of the extra around the tables and surfaces.


And one final looks at how they turned out!

I don't know about you, but I was very excited about how they look!


Tuesday, February 14, 2012

{My DIY Valentines}


Pin It
I had seen this idea here last year and Knew I Had to do it!!!


This was so simple. The hardest part was getting my kids to cooperate. Really I expected to only get my 4 year old daughters done. I mean who was my 1 year old going to give valentine's to? I just got lucky with a picture of him.


He actually had food in his hand so it was balled up already lol. It is very hard even with my DSLR to capture a picture of him where he is not a blur. Especially because he likes to walk right up to the camera lens and wave in it, try to look through it, or touch it - HA!


And my sweet girl did several poses. Not sure why she likes to cock her head this way, but its the newest pose, so I went with it since it is the phase we are in.


All I did to edit these basic pictures was to open them up in picnik.com (which is closing in April) and added borders, text boxes, and the little stickers for Walker's. I only added the stickers to his because of the glare on the side of his face.

I then loaded these up to CVS and used a code to get them printed for free- 25 pictures total.

I plan to take a little exacto-knife and slice a small hole at the top and bottom of their fist and slide a sucker that we purchased into it. On the back of the picture, we will write the name of who it is to.


Thursday, January 26, 2012

{Canvas photo gift}


I wanted to make a special heart gift for my sister and brother-in-law for Christmas. What parent doesn't love a gift that shows off their child.


Here are the materials I used:

  • one 8x10 canvas out of a 2-pack from Hobby Lobby
  • black tempera paint
  • sponge
  • spray adhesive
  • mod podge
  • scissors
  • and of course a picture of choice.
You may notice that the picture I used has been edited. I had asked my sister and brother-in-law to send me their current favorite picture of their daughter and some words, phrases, nicknames, or whatever that described her or meant something to them right now. Let me tell ya, that was such a neat thing to experience that relationship. So I just made the picture black and white and added these special words in various colors and fonts around her.


Next I put the black paint on my canvas and spread it around with the sponge. I wanted it to look a little rough and some white peek through. Then let it dry.

I trimmed the picture down and sprayed the back with Spray adhesive to figure out where to place it on the canvas and hold it while I added the mod podge.


So I spread the Mod Podge on in thin layers with a sponge. This gave it a matte finish. You have to let it dry and give it several layers of the mod podge to seal it well.


It turned out so good. I was very happy with how sweet it turned out and so were my sister and brother-in-law.


Pin It

Monday, January 16, 2012

Mason Jar wine glass.....

I had a quick fun gift to make for a Christmas party, and had seen these wine glasses at the Southern Christmas Show. I am already going to apologize for the poor pictures my phone took. I put it together quickly one night and took pics as I threw it together.


Here is the step by step:

These are the materials I used.
  • medium sized mason jar (quart) already on hand
  • cheap candlestick from thrift store .50
  • DAP adhesive- already on hand.


just another view of it.

I flipped the jar over, centered where I wanted the candlestick to go.


Added the adhesive around it.
held it in place for a little while and let it sit overnight.

and this was the final product.

Deals:

(clicking links helps fund this blog)