I like to remodel and recover things as well. I just don't do it very often. It really is simple. I am fortunate that before I decided I could do some building and woodworking projects on my own, my hubby and FIL would make it for me. It just usually wasn't on my schedule or as fast as I wanted it unless I had a deadline.
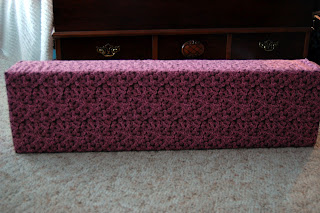
My husband made these cornices for me to use in our first nursery. Obviously it is very girly. The prints we chose had to at least go along with our master bedroom decor as the room was right off the master. You literally walked through the nursery to get to the master bedroom. That was our plan when we built this house and we knew we wanted to have our nursery very close by as new parents.
Well that only lasted the first child. So then we changed it to an office or mini man cave for my husband. It has a tv and recliner and his video game systems, book shelves, and holds our printer and some decor on the walls.Well our pink swirly cornices didn't match his manly room lol.
So here are photos of what I did.
Here is the before
And a close up of the design
1- used flat head screwdriver to pry staples off that held the fabric
2- I left the batting on for some padding
So I had this fabric from my grandmother. It's a blue velvet fabric that worked out perfect for this project. And goes well with our barn brown walls. I just cut it in half to fit both cornices.
I laid it down under the cornice and folded it over to make sure it would cover everything.
Then you start folding it over, pulling it tight, and stapling it in place. And that's it.
So what do you think?
AFTER
AFTER


