Friday, December 23, 2011

{Christmas Card Display}

We love getting cards from family and friends. we mostly get picture cards now showing off the growing kids and family members, and we want to display them. Our mantle now holds our advent bags, but we wanted a display that was bright and colorful. So I scouted Pinterest, and a fellow bloggy mom who did a similar project and made our own Christmas card holder.

This is what it looked like finished.


I started with this basic wood plaque I grabbed at Walmart for ~$6.

Then painted it a green color that we already had at the house.
I used my Cricut and Make The Cut software to create the words and cut them out onto any vinyl.
It didn't matter the color vinyl because I was using it as a stencil. See how nice it looks.
I didn't get any pictures of the next steps because my hands were full doing it and I had a little 4yo helper. But I used glue, basic glue, and squeezed it onto the letters. I did it along the letters so it would be raised up. I did one letter at a time and dumped the red glitter on it while still wet to stick better, and for full coverage. Use LOTs of glitter, you can shake off excess later, but you want a good coverage. Remove the vinyl carefully while still wet. It makes it cleaner edges and doesn't pull off the whole letter, like it would after it has dried.
This is what it looked like after taking the vinyl stencil off.
Once I let it dry, I flipped it over and stapled ribbon to the back of the board to attach the cards.

I didn't have anymore ribbon, and didn't want to go upstairs, so I used what I had downstairs- red Tulle. I just cut a length overlapped it and stapled it like crazy to hold it in place and make a loop to hang it from.


Ta-Da!


And here is a picture of it with many of our Christmas cards added! Still more arriving. Pretty sure I will need to add longer ribbon. I love it though!

Merry Christmas!

and don't forget to send me your projects using the Freebie Friday items for the contest.

{Freebie Friday} and a contest


I am hosting a contest this week to share your projects made with these Free Digital images. So get to working on them, share your tips, and send them to me at begintocraft@gmail.com for the contest!


This week's Freebie from Share the Memories:


Well anyway, Be sure to grab it up while you can. You will have one week to download this freebie.

You can download this weeks freebie by clicking here.


This Freebie contains the 2 Quick Pages shown and all the pieces (papers and elements) used to create those Quick Pages!
(The elements and QuickPages are.png and the papers are .jpg format.)


Remember, I will be sharing a new freebie every week.

If you have not purchased the software yet, you can do so here:


Use my code for a discount:

CODE: STMMMS72256
(I do get compensated if you use this)


They have a great social media presence and support group:


Tutorials on how to use the software and tips can be found here.

Tuesday, December 20, 2011

{Great Gift Idea}


Crafterhours was one of the first blogs I began following. I just saw this pop up on my feed from last week, and I can't tell you how excited I was to see it. I had to share it right away! 

This is a DIY audio book idea having family members read a book to your children. Genius. No need for a special priced book sold in stores that they can record into and it one day break. You have to read this. I hope to get this done at least for next year. I Love special gifts like this!

crafterhours: Record Your Own Kids Audio Books: A Tutorial:

Monday, December 19, 2011

{It's a Holiday Contest}

Ok now, it's Contest time. 

All these Freebies I have been posting on Fridays. Its Time to Show me what you got! You don't have to have My Memories Software to use these freebie downloads. Show me what you have made using them, and have a chance to win a $5 Amazon Gift card and a special download just for the winner. 


You can email me your projects at Begintocraft@gmail.com. I will post all of them and announce the winner in a post. You have until December 30th to submit your entries.


There will not be much activity on here the next couple weeks due to the holidays and spending time with my family. I hope you all have a Very Merry Christmas!

Friday, December 16, 2011

{Freebie Friday}

I will be having a contest Christmas week to share your projects made with these Free Digital images. So get to working on them, share your tips, and get ready for the Christmas week contest!


This week's Freebie from Share the Memories:


Well anyway, Be sure to grab it up while you can. You will have one week to download this freebie.

You can download this weeks freebie by clicking here.


This Freebie contains the 2 Quick Pages shown and all the pieces (papers and elements) used to create those Quick Pages!
(The elements and QuickPages are.png and the papers are .jpg format.)


Remember, I will be sharing a new freebie every week.

If you have not purchased the software yet, you can do so here:


Use my code for a discount:

CODE: STMMMS72256
(I do get compensated if you use this)


They have a great social media presence and support group:


Tutorials on how to use the software and tips can be found here.

Thursday, December 15, 2011

Tuesday, December 13, 2011

{DIY Cupcake Topper design}

Ok I think these things are SO darn cute. I love when I find the freebie printables and downloads, but sometimes it is hard to find what you are looking for, a certain theme or such, ya know.


I have been scouring the internet for a week now for a tutorial on how to do it myself because after all I am a crafty person and just can't bring myself to pay someone to do it on etsy.

So I figure there are lots of options.
  • using my cricut to cut out the shape and using a sticker for the image, easy and cute and pretty quick, but tough for doing something boyish and tractor like 
  • I could use MyMemories Suite- haven't tried that yet, no time at home lately but hope to try that option soon
  • or the way I found recommended to do it- use Microsoft Publisher. 
    • add shape (circle or square), insert fill color (or a picture), then add word art- letter or number, or clipart. 

Well I was at work, shhhh, and had a few minutes and we do have MS Publisher, so figured why not try it. I have not figured out how to add the nice dot borders and such, but here is what I made:


Topper

I am pretty darn excited about how it turned out. As you can probably tell we are doing a farm/tractor theme for my son's birthday party. We have a Farmall Cub tractor- which is red, not green like John Deere, so I had to search for the right images and color schemes. I have this available for free download if interested just click on it above. I may try to do a couple generic ones but you may be able to figure it out yourself. Good Luck and I hope this VERY basic tutorial or description helps you out. I have not used Publisher before, so it took a bit getting used to where things could be found, but it was still pretty darn easy.


I also realized you may not want toppers that have 1's and W's or my son's name on them, so I made some generic ones. I only ask that you give me credit and send followers back my way for sharing them. I found it very hard to find free tractor toppers, so here are some for you:

Generic Tractor Topper                                                                  
So I left a couple blank so you could add in names, or letters or numbers of your own.

Monday, December 12, 2011

{Advent Bag Project}

I decided to do advent bags this year. I used fabric I had on hand. You may remember it from this post about recovering the stool. I wanted it to be a little more neutral and not stand out so much against the other Christmas Decor.
Here are my pretty advent bags hung at the fire place.

I stink for not taking pictures of cutting my fabric, but really I just eye-balled it. I wanted them fairly small because we planned on just putting paper/cardstock in it not actual items. I took my fabric and folded it up with raw edges touching at top and sides, but fold at bottom. Then I counted out how many bags I felt I could get out of that one strip. I got 12, and just made little cuts with my scissors just at the bottom fold to mark it. Then I "tore" it with my hands up to "cut" out the sizes. I then did the same thing for another stretch of fabric to give me 24 bags. 

Then I took them upstairs and had paired them up inside out and sewed up the side seams.
 I used a stencil set that I already had from Michael's that has a sticky back to add my numbers to the bottom right of the bags. I tried my Staz On ink pad and a sponge and it didn't work so well. I also tried a red marker and didn't like how it looked, so just grabbed a black sharpie.

 And this is how my black sharpie and stencil turned out on the bag. I like it!


 I then planned to use this "thread" (don't remember what its called but we have a ton of it thanks to my Mimi) and these plastic needles to hand sew drawstrings on the bags to just do a basic cinch. But I didn't like how it looked and needed to get them up, so I didn't do anything to cinch them. Just took safety pins- because I also had a ton of them (thanks to hubby for the suggestion). and pinned the bags in order to the ribbon I already had hanging from the baby boy's birthday party (his pictures had hung from it).
That was it, really simple. It's been fun to do. I sat down with a calendar and a list of activities we wanted to do and just wrote them out on pieces of paper based on what the day of the week was and if we already had something planned to do that day, used it as our activity. Mostly trying to do things at home as a family- like a craft, or baking, or watching a movie, etc.

Friday, December 9, 2011

{Freebie Friday}

This week's Freebie from Share the Memories:


Well anyway, Be sure to grab it up while you can. You will have one week to download this freebie.

You can download this weeks freebie by clicking here.


This Freebie contains the 2 Quick Pages shown and all the pieces (papers and elements) used to create those Quick Pages!
(The elements and QuickPages are.png and the papers are .jpg format.)


Remember, I will be sharing a new freebie every week.

If you have not purchased the software yet, you can do so here:


Use my code for a discount:

CODE: STMMMS72256
(I do get compensated if you use this)


They have a great social media presence and support group:


Tutorials on how to use the software and tips can be found here.

{Vistaprint Freebie Deals} pay shipping only

Vistaprint - Stockings + Stuffers - Day 5 Free Tote Bags!


5 days of deals! Over the course of five days get the complete package of stockings and stuffers. The 5th day features Free Tote Bags! Just pay the shipping! Shipping starts at $4.41.


(affiliate link)
 
I usually grab my hubby a tote bag for the garden and a T-shirt from these deals!

Thursday, December 8, 2011

{Pinterest project}

I have loved this idea for quite some time. I finally finished it in just a few minutes Saturday morning!


I used the frame I had sprayed and used for Fall. I just removed the fall wreath. I saved out 5 ornaments from our tree that I wanted to use of various sizes, colors and textures. And found different ribbon in my stash. Gotta love a totally free project because you already have the supplies around. These ornaments were purchased from Target several years ago, like 6 at least lol.


Then I just started with placement. Strung the ribbon through the loop of the ornament, and held it at the top of the frame til it got to a length I liked. then cut and tied it in place. I started with my shortest and longest lengths first. Then, I added the 3 other ornaments at various lengths till it just felt right to me. I went longer with the ribbon lengths because I can always tie it up higher, but it gave me the option to make it longer too if I wanted.

Quick and Easy, Simple and Free!


Wednesday, December 7, 2011

{@Giggles, Glitz, & Glam}

Go check out Jana's blog where I am guest posting while she is out on Maternity Leave!


Giggles, Glitz, & Glam

{Lil home Photo shoot}

Well let's say It was in the 70s a few weeks ago here in NC and I wanted to grab a few pics of the boy for his Birthday or at least to capture his One Year Old self. But he would not cooperate. His sister- my lil model, was a different story.
These 2 were a couple of my favorites, even though he is not looking at me I could at least entertain him with grass and the free range chickens wandering the yard. My little cowgirl just kept posing.
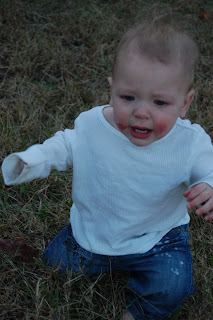
This is Mostly what I got with the Boy. You can see his face broke out from one of his many food allergies. He wanted me to hold him, didn't want to play or crawl around or take pictures of his sister. Yep, Not fun, and definitely not the photo shoot I envisioned. I needed my friend Kristen (our normal photographer) and her hubby with his duck call for distraction and entertainment.

Then Miss Priss danced and posed her way around the yard. She was so much fun, and who could tell there is a screaming baby behind that camera lol.

Miss Priss wanted her shot at taking pictures, and though we had many that didn't turn out, and I was VERY leary of handing over my Nikon DSLR to her, I was pretty impressed with how well she did. These were the only non-screaming, looking at the camera shots we got. The above one he actually looks sleepy, but I do love the snuggles.

He was DONE now, headed back to the house, and yes he was still screaming lol.

Tuesday, December 6, 2011

{Farm themed Birthday party}

I was worried how I was going to decorate a boy party, especially at just a year old. I was pleasantly surprised to find I enjoyed it and got more crafty than I personally did for the girl.

Thankfully a cousin sent some decor from her boys 1st birthday parties earlier this year. we didn't really go overboard though. It was just family that attended. He has so many allergies I was either going to make everything or have to spend a lot of money to buy specialized food items, and that was going to limit me to a smaller crowd. I wanted to make sure since the day was about him that he could eat everything that was served. A tutorial will come about how I did the banner behind his seat.
I made both the cake and cupcake using egg and dairy free recipe I shared in an earlier post. This time I did lemon flavoring, but baked it a tad too long, because the chocolate was so moist and gooey that I wanted to let it set up a bit more.
The cupcakes turned out so fun. And thankfully the icing was just the basic powdered sugar/crisco mix. we did use the vegetable based one though. I made the cupcake wrappers using my Cricut and MTC software- it cut it out so easy and I just taped them to keep them shut. I also made the cupcake toppers, and will be posting a tutorial soon to describe to you how I did it so you can make your own. It was much more simple than I thought.
I printed out some stickers/labels that said Happy 1st Birthday Walker on it just to add an extra detail to the cups.

Here is the birthday boy in the shirt I made him and shared on here. And his sister- who got a special treat as well.
I strung up a ribbon to our fireplace and taped pictures of him throughout the year to show his growth and how much he had changed. 

He did not touch the flame, but he was VERY interested in it lol. And he enjoyed the cake so much I had to change his clothes to the other shirt I made him.


He was not yet into tearing the paper off, but enjoyed playing with his new toys. Especially the cozy coupe car!


We were able to pose for a few quick family pictures that I Love. You can see his icing already smeared on his drink cup and hand. It was a much simpler party, and we definitely enjoyed it! I can't wait to finish writing up the tutorials to share how to make some of these items. Much easier than anticipated.

Monday, December 5, 2011

{Men who cook}

I realize I am very lucky first of all to have a husband who will cook, let alone one that comes up with ideas and is not afraid to try something new. Many times I think he should have gone to cooking school. 


This was one nights dinner that he threw together.
First of all we have sliced turkey rolled up into croissants.
Then we have fresh mozzarella sliced, breaded and fried, along with some corn nuggets from the freezer


see that buttery golden brown color with the turkey peeping out. He drizzled it with homemade honey mustard. see how things just click with him.
And the Fried Mozzarella was so yummy. we didn't need any marinara for it to be dipped in. I was definitely one spoiled girl this night.

Deals:

(clicking links helps fund this blog)