Friday, March 9, 2012

{Freebie Friday}


Make sure you take advantage of this week's Freebie from Share the Memories:
I love the embellishments that come with this set. The little jewel looking dots, hearts, and ric rac.


You will have one week to download this freebie.

You can download this weeks freebie by clicking here.


This Freebie contains the 2 Quick Pages shown and all the pieces (papers and elements) used to create those Quick Pages!
(The elements and QuickPages are.png and the papers are .jpg format.)


Remember, I will be sharing a new freebie every week.

If you have not purchased the software yet, you can do so here:


Use my code for a discount:

CODE: STMMMS72256
(I do get compensated if you use this)


They have a great social media presence and support group:


Tutorials on how to use the software and tips can be found here.


Pin It

Thursday, March 8, 2012

Guest Post {Bigger House}


Guest written by our friend Katie Callahan
When my husband and I decided we needed a bigger house, we never thought that it would be this hard to find the right place. The kids were getting older, and we had outgrown our house. We searched all over Concord but nothing seemed to fit our needs. We wanted a place that was ready for us to live in since we didn’t have the time or energy to renovate a place, but a lot of the large houses on the market needed work. It took us six months to finally find this house, but we think it was worth it. The house is prefect, and we cannot wait until all of our things are moved in and unpacked. The kids can’t wait to each have their own room, and we haven’t told them yet, but we are looking into direct tv concord to see if we could afford to have a TV in each of their rooms. We’re glad that we found a house close enough to our current one that they won’t have to change schools either. It should be an easy transition for them, and the TVs would just be icing on the cake.


Pin It

Wednesday, March 7, 2012

{More Organizing}


I am still nesting. My new baby is almost a month old and I have So much energy so every nap or time to myself I am cleaning and reorganizing and decluttering things. My kitchen is looking SO good. I am loving my cleaned off counters, almost completed pantry, silverware drawer, and the only thing I am not sure what do with is my knife drawer. 


I don't like having a knife block on my counter. And I need stuff out of the kids reach. I am looking for a good way to keep them out of the way and they are currently in a drawer but my son likes to open drawers and grab stuff out. So worried he is going to grab a knife one day and get hurt once he gets much bigger. 

I have seen these neat knife blocks in a drawer from the container store. I like it a lot. I also stumbled across the website for Knife-depot. (www.knife-depot.com). I took a look at these knives- the boker knife, Spyderco knife, and the gerber knife. It has some great deals on great knife sets including the ginsu and miracle blade sets. So just had to tell you about that little gem. I am still on the hunt for a safe way to organize this knife drawer.....do you have any tips?


Pin It

Tuesday, March 6, 2012

{Guest Post} Educational Activities for kids


Pin It

Guest Post by Anne Mercado. Bio at bottom of this post. 
Thanks for your help Anne.

Has learning become a chore for your preschooler and school age kids?

Do not despair! There are tons of educational activities for kids that are easy and FUN to do!

All you need are a few household items - and maybe a single trip to the store - and you're on your way to teaching using creative ways.

Below are simple activities that hone skills in math, science, language and of course creativity. Without further ado here are...

7 Educational Activities for Kids

1. Squares in a shape

This is puzzle can easily be made using items around your home. The beauty? It improves children's math and spatial skills.

Don't have blocks? Use scrabble letters instead.
Source: Nicole from The Activity Mom

2. Sidewalk chalk math

To jazz up rote memorization, count by groups using this activity. All you need is some chalk and lots of energy for skipping.


Source: Becca of Fun & Engaging Activities for Toddlers

3. My heart goes boom, boom, boom!

Show your kids a heart real up close with this science project that features the cardiac vein and coronary artery. All that's needed are ziplocks, straws, pipe cleaners, a red marker and glue gun.

The best part? Children can blow into the heart to simulate beating.


Source: Holly from Quirky Momma (Contributed by Caroline from Everything and nothing: Activities for Preschool, which is actually in French)

4. Spiky Sea Urchin

Another science activity is to learn about sea creatures, specifically the sea urchin.


Source: Valerie from The Crafty Classroom

5. Moon Sand Activity

The recipe calls for sand, water and corn flour. That's it. After mixing everything, children can free-play with this sensory activity.

Mold and shape - just don't eat them.


Source: Sherry from Play Based Learning

7. Lego Words

Here's a new way of using those Lego blocks for your little readers. Stick letters on them to help kids improve on their language skills.


Source: April of Chalk Talk


Learning doesn't have to be boring, nor does it mean endless hours buried in books or educational videos.

With these simple educational activities for kids, you can incorporate fun and learning with a bonus: you get to spend quality time with the kiddos.

Have anything to add to the list? Do share them here with other moms.


Anne Mercado is the quirky author behind Green Eggs & Moms, which offers clever parenting tips and news to keep moms with young kids sane. When she's not hunched over the computer working, you can find her either counting down to ten to get her kiddo to move faster, or reading a horror book. She also loves vampires and zombies.

Monday, March 5, 2012

{New Site} from some Blogging Rockstars


Pin It

I am posting about this today because it is the day this site goes Live with awesome Tips and tricks and How-to's on how to Really REALLY use your DSLR camera in MANUAL mode. When I am back to work from Mat Leave and have some extra cash, I will be taking several of their classes.


Shootflyshoot.com is a website started by Kevin of The Lettered Cottage blog that he does with his lovely wife Layla. Kevin runs Shootflyshoot.com along with his friend Josh.

Here is a short video about it that Layla shared on their blog.

INTRO with outtakes! from Shoot Fly Shoot on Vimeo.

The first class they will offer starting today is Photography 101 (2 hr and 40min class) and its just $69. AND because its on video you can pause, rewind and re-do over and over to get it down. They show you the buttons and settings and walk you through it several times, AND you will have access to it forever.

Be sure to hop over and check them out and show some love on opening day!

Friday, March 2, 2012

{Freebie Friday}


Pin It

Make sure you take advantage of this week's Freebie from Share the Memories:

In case you didn't have anything to do your Valentine's pages with, or to get a head start on DIYing your own Valentines for next year, Here is a cute freebie with hearts to use.


You will have one week to download this freebie.

You can download this weeks freebie by clicking here.


This Freebie contains the 2 Quick Pages shown and all the pieces (papers and elements) used to create those Quick Pages!
(The elements and QuickPages are.png and the papers are .jpg format.)


Remember, I will be sharing a new freebie every week.

If you have not purchased the software yet, you can do so here:


Use my code for a discount:

CODE: STMMMS72256
(I do get compensated if you use this)


They have a great social media presence and support group:


Tutorials on how to use the software and tips can be found here.

Thursday, March 1, 2012

{Guest Post} How to make Plarn


Pin It


Thank you to Tammy Curry for Guest Blogging today. Read her profile at the bottom of this post.

How to make plarn

We love to craft at our home however we don't always have a ton of ready cash for supplies. So we have begun repurposing items into various crafts. Our most current passion is plarn aka plastic yarn. An awesome material work with, tons of fun for the kids. The only tools you really need are a pair of scissors and a crochet hook, materials plastic shopping bags and an imagination.

Just as a quick note, do not be intimidated if you do not know how to crochet. There are plenty of easy to follow videos on YouTube.com.


Smooth out your plastic bag on a flat surface.


  1. Fold the bag in 1 to 1 ½ inch sections.


  1. Cut the handles and the bottom of the bag off. I save these for stuffing. One of our goals is to make outdoor seat cushions.


  1. Cut the bag into 1 inch strips while it is still folded.


  1. Insert one end and then back into itself and pull tightly to join them together.


  1. Begin rolling like you would roll a ball of yarn. To add to an existing roll take the end of a new strip and attach by inserting the loop of the new strip into the end of the existing roll. Pull the loop of the new strip through itself and pull tightly. Similar to when you created the loop.


  1. Begin crocheting your project. You can follow standard crochet patterns. Blankets can be made to use at picnics, etc. Just remember any projects need to be washed by hand and not go into the washer or dishwasher.


    About Tammy Curry: 

    Crazy, insane, and loving life here on the beach. We have been through a lot over the years but I can honestly say that the light at the end of the tunnel was not an oncoming train this time.

    I have a loving husband and two beautiful children. We are no longer homeschooling our children, they will be attending private school this year. We do still support our friends and family that are on that awesome journey.

    I am a writer, social media addict, mom, wife and daughter, not always in that order.

    My husband and I are working towards a more sustainable lifestyle. We have been on and off the wagon on this over the years. We have spent the last few months putting our plan together and putting it into play. Our end goal is creating a viable, self sustaining suburban homestead.

    To this end we have created the Sustainable Education Initiative. We will be sharing our journey and teaching others how to make simple changes in their own lives. The end goal is to create a better world for our children and their children.

    You can find out more about Tammy and follow her blogs here:

    Thank you for filling in while I enjoy my new little one! 

Wednesday, February 29, 2012

{Yummy Tiramisu Recipe}


Pin It

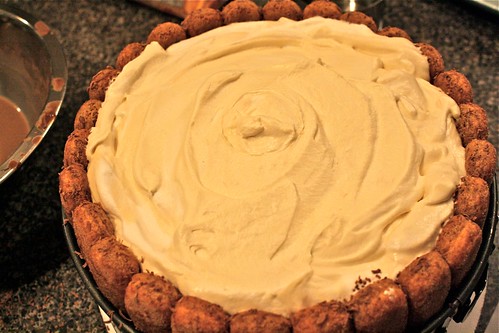
Tiramisu is one of my favorite desserts. Surprising to my husband because I LOVE CHOCOLATE!


Jayna has a simple recipe posted that I can't wait to try.


Check out her post with the recipe and step by step pictures here at Behind the Studio.

IMG_1144


I will let you know how it turns out when I make it.

Tuesday, February 28, 2012

{DIY cupcake toppers}

I wanted to share with you how I put together the cupcake toppers I designed and made for my son's first birthday. I am sorry it has taken so long, since his birthday is in November and this post has mostly been written up in pieces since then. However, then the holidays rolled around, and then my focus has shifted to preparing for Baby Girl #2 arriving this month. So please forgive me.


I used the toppers both for the cupcakes and the cake for some decoration.


Here is a sample of the tractor topper I made and printed out. See the very short and basic step-by-step of how I made them here.


These are 1 inch circles, so to be simple I used a 1 inch circle punch to get them all punched quickly. Then I knew I wanted to layer them with some cardstock of some color. I did not have any bigger size circle punch. I was figuring 1 1/4 or 1 1/2 inch punch for the layered piece. I had looked and these are like 9.99 at least, and both Michaels and Hobby Lobby were out of this size. So I checked out a local downtown shop in Lincolnton, NC called Chic Custom Creations and I tell ya, I hit the jackpot.


I was able to use THEIR supplies/equipment- not paper for $5. I bought paper for 50 cent, and used their supplies to cut out my green and red 1 1/2 inch circles there and take them home to layer. This made my life to simple. I had planned to buy one and they did have it, but once I bought it and got home, no telling when I would have found time to do it. But I was kid free and sat down and got it done in less than 5 minutes. They were super helpful, offering suggestions and tips, helped me find what I needed. Koni- the owner, was not there. She was at a charity scrapbook event, but the staff that was there was very knowledgeable and kind, so I cannot imagine that Koni would be any different. They offer classes for various ages and levels through out the month.


So here is a picture of my green and red layer to see how it would look once I got home.


Then I just taped the 2 layers together and added toothpicks on the backs with tape and done!

This made for super simple decor for the cake and cupcakes. I also laid some of the extra around the tables and surfaces.


And one final looks at how they turned out!

I don't know about you, but I was very excited about how they look!


Friday, February 24, 2012

{Freebie Friday}


Pin It


Make sure you take advantage of this week's Freebie from Share the Memories:
I love the embellishments that come with this set. The little jewel looking dots, hearts, and ric rac.


You will have one week to download this freebie.

You can download this weeks freebie by clicking here.


This Freebie contains the 2 Quick Pages shown and all the pieces (papers and elements) used to create those Quick Pages!
(The elements and QuickPages are.png and the papers are .jpg format.)


Remember, I will be sharing a new freebie every week.

If you have not purchased the software yet, you can do so here:


Use my code for a discount:

CODE: STMMMS72256
(I do get compensated if you use this)


They have a great social media presence and support group:


Tutorials on how to use the software and tips can be found here.


Monday, February 20, 2012

{Things to Love Roundup}


Pin It

Heather at Family Friendly Frugality shared this deal at Snapfish!
I LOVE ordering photo books! It’s so much neater than putting individual prints into an album and it makes a great gift! Snapfish has a *HOT* deal going on right now! 40% off Photo Books with the Snapfish promo code BOOKIT40!


~~~~~~~~~~~~~~~~~~~~~~~~~~~~~~~~~~~~~~~~~~~~~~~~~~~~~~~~~~~~~~~~~~~~~~~~~~~

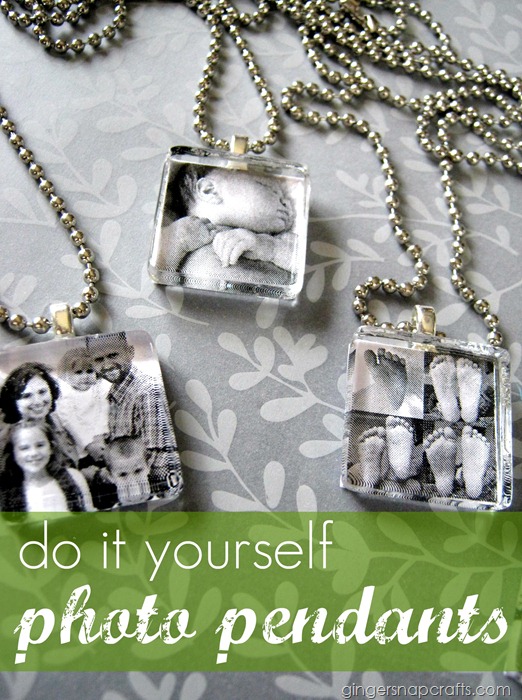
Ginger Snap Crafts shares a DIY photo pendant tutorial


~~~~~~~~~~~~~~~~~~~~~~~~~~~~~~~~~~~~~~~~~~~~~~~~~~~~~~~~~~~~~~~~~~~~~~

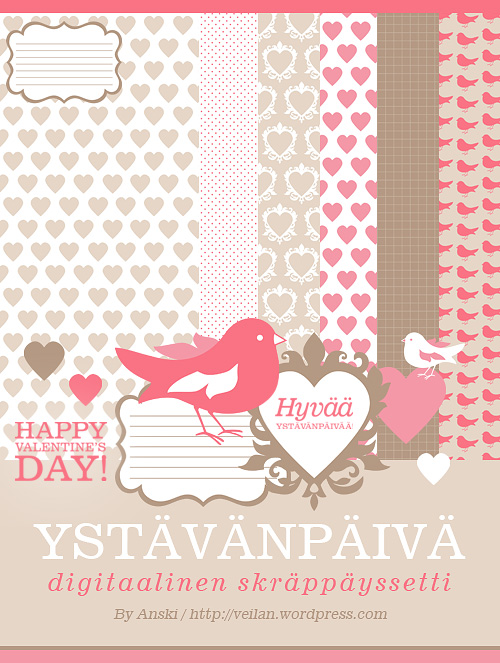
This blog- Cute and cool Creations, shares an adorable Valentines scrapbook set. I would say this is a must have whether you scrapbook or not. I can see a TON of uses for the patterns!


~~~~~~~~~~~~~~~~~~~~~~~~~~~~~~~~~~~~~~~~~~~~~~~~~~~~~~~~~~~~~~~~~


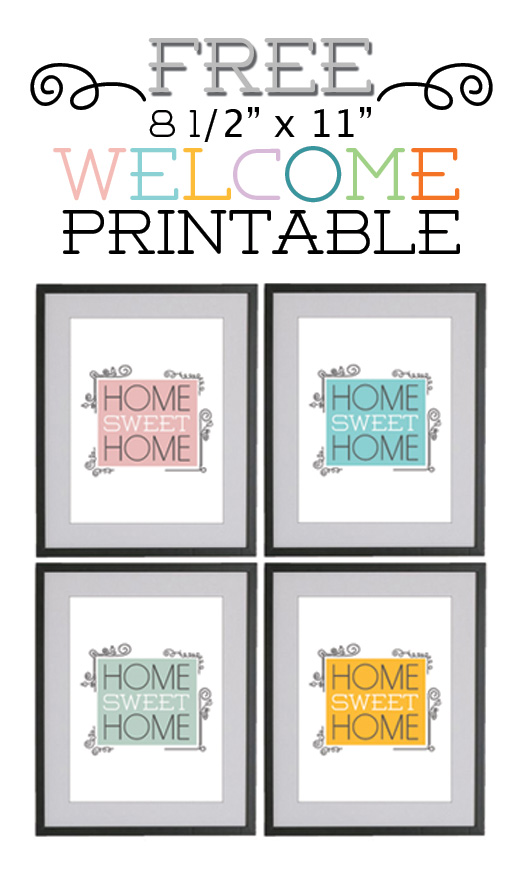
Perfect Valentine Printable from My own Road's Blog


Also available in gray and teal.

~~~~~~~~~~~~~~~~~~~~~~~~~~~~~~~~~~~~~~~~~~~~~~~~~~~~~~~~~~~~~~~~~~~~


And Finally from Richella of Imparting Grace:


Hope you enjoy these Great February finds as much as I have.


Friday, February 17, 2012

{Freebie Friday}


Pin It


Make sure you take advantage of this week's Freebie from Share the Memories:

PLAID! I have always loved a little plaid. This also reminds me a bit of the Burberry pattern. Sweet little lovelies can be made with this pattern.


You will have one week to download this freebie.

You can download this weeks freebie by clicking here.


This Freebie contains the 2 Quick Pages shown and all the pieces (papers and elements) used to create those Quick Pages!
(The elements and QuickPages are.png and the papers are .jpg format.)


Remember, I will be sharing a new freebie every week.

If you have not purchased the software yet, you can do so here:


Use my code for a discount:

CODE: STMMMS72256
(I do get compensated if you use this)


They have a great social media presence and support group:


Tutorials on how to use the software and tips can be found here.


Thursday, February 16, 2012

{Friends Count}


Pin It
 
I think one thing we all know, learned early in fact, is how much we need friendship. That finding the right friend, fitting in, working through tough stuff with them is what makes life worthwhile.
 
I enjoy watching my daughter learn to make and keep friends. I sit back and let her talk through what she does and doesn't like about someone, and work it out. I would say my best friend is definitely a tie between my husband and my sister. They are the 2 people I call first for just about anything. My next BFF is not family- but she sure feels like it. We survived a sorta big fight, a lot of heartbreak, a move far away and back, and I am better for knowing her and her family. Her friendship through our various life changes, joys, and sorrows in spite of knowing what to say, how to act, and messing up, begging forgiveness has given me great hope. It has taught me to continue to be positive and encouraging to others that struggle with their friends. We never know what could have happened for someone to pull away from us. It could be us, could be them, could be something else entirely they just aren't able to talk about yet. But if the friendship really means something to you, you will continue to show the person that you are there for them, you care, and talk it out.
 
I have learned some friendships aren't meant to last. They are there for a season. We outgrow them, outgrow what they can teach us. I don't think this is a bad thing, it can be sad, but look back at the time together and smile and take what you learned from it and move forward. There is another friend out there that you need as much as you need them.


Well Build-A-Bear is celebrating!

~Celebrating a 15th Birthday
~Celebrating 100 million Best Friends made
~Celebrating Friendship


My daughter has a Build-a-Bear friend we made her on her first trip to the beach. She still has it and sleeps with it. I think it is a sweet thing to make a bear the way they do it, the stuffing, kissing and wishing on the heart you put in them, naming them. It is such a personal process.

I am not being compensated for this post. Just asked to share the information.

I hope you all have friends that you can count on, and if you have a little extra money and want to do something special- allowing your child to build a friend is definitely something to consider.


Wednesday, February 15, 2012

{Free Home Printable}


Pin It
 
 
 Jayna at Behind the Studio is offering this awesome Free Printable!
Go check it out yourself!


Be sure to check out her blog for fabulous ideas

Deals:

(clicking links helps fund this blog)